Author Archives: Mama

Kindergarten Social Studies Curriculum

General American History through children’s literature:

Printed Resources:
Ron’s Big Mission / Rose Blue
George Washington’s Breakfast / Jean Fritz
Kids in Colonial Times / Lisa A Wroble
Hornbooks and inkwells / Verla Kay
Off like the wind! : the first ride of the pony express / Michael P. Spradlin
John, Paul, George & Ben / Lane Smith
Potato : a tale from the Great Depression / Kate Lied

Video Resources:
National Geographic: Lewis and Clark (PBS)
Dear America Season 1 Episode 1 (Netflix)
The Real West: Trailblazers and Scouts (History Channel)
Pioneer Life for children (DVD)

Kindergarten Science

General Science through guides and literature:

Printed Resources:
An Instant Guide to Trees / Eleanor Lawrence and Cecilia Fitzsimons
Oh Say Can You Say What’s the Weather Today?: All About Weather / Tish Rabe
The Way Things Work / David Macaulay
Birds of Tennessee Field Guide / Stan Tekiela
First Human Body Encyclopedia / DK Publishing
And Then There Were Eight: Poems about Space / Laura Purdie Salas
Do Turtles Sleep in Treetops?: A Book About Animal Homes / Laura Purdie Salas

Video Resources:
Wild Kratts (PBS)
The Cat in the Hat Knows a Lot About That (PBS)
The Way Things Work series (DVD)
Nature (PBS)
How It’s Made (Science Channel)

Greeting Card Boxes

boxes

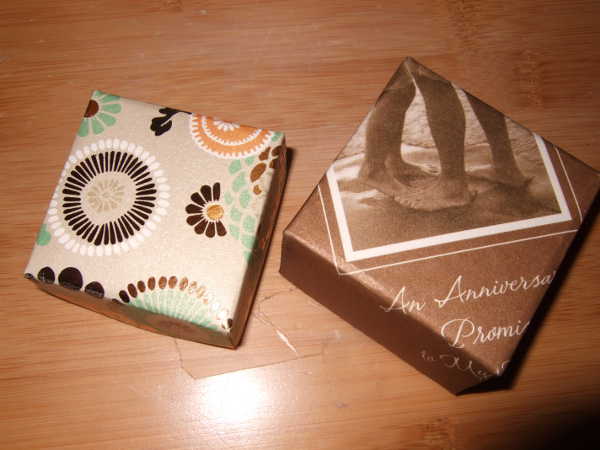
My Aunt Gladys diligently made these little boxes from all the greeting cards she received. I was so honored that she showed me step by step how to make them so that now I have made many of my own. I now have had the honor of showing this technique to my son.

Use these little boxes to store items, give small gifts or as decorations.
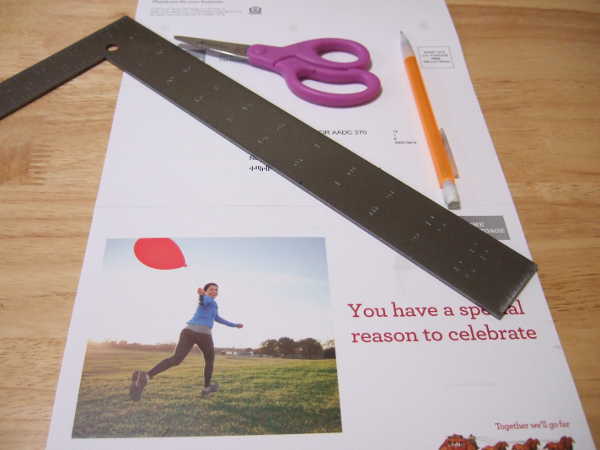
box1

Materials:
Greeting card or light card stock mailer/ad
Ruler or L-square or T-Square
Pencil
Scissors

box2

If using a greeting card, us the front of the card for the top of the box and the back of the card for the bottom of the box. If using a mailer, you can save half for the bottom of the box or use another mailer for the bottom.

box3

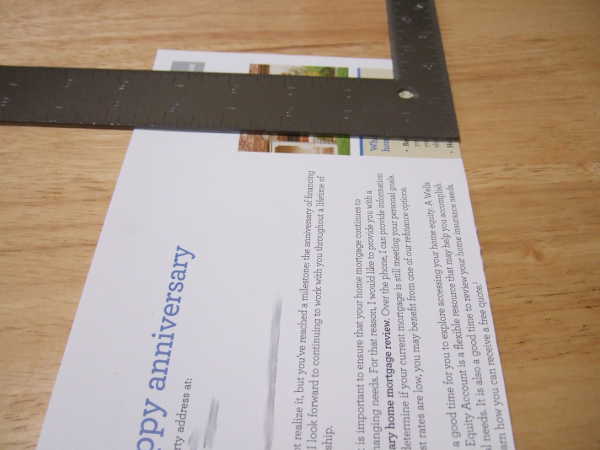
Measure the material for the top the shortest direction. Measure and mark a line to cut to make a square. If you are using a ruler, you will need to make two marks at either side at the correct measurement and then draw a straight line. If you are using an L- or T-ruler, you can mark the measurement once and draw the line square from the long edge.

Make a note of this measurement because you will want to make the square for the bottom of the box 3/8 or 1/2 smaller on the sides than this square. Use 3/8 for lighter stock and 1/2 for heavier.

box4

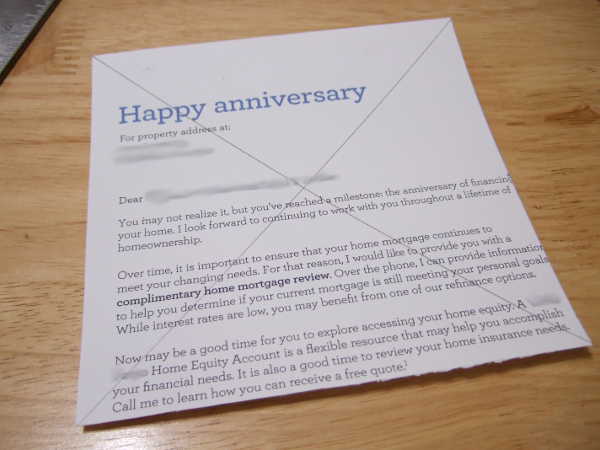
Cut along that line to get your square. On the back side of the paper from what you want to show on your box, draw lines between opposite corners. The crossing point is the center of your square.

box5

Fold one of the corners so that the point of the corner is right at the crossing point of the lines. Crease the fold well with something hard such as the back of a spoon.

box6

Fold again so that the fold just touches the center line. Crease the fold well. Unfold both folds. Turn the square a quarter turn and make both folds on the next corner. Repeat for the other two corners, always unfolding first before moving to the next.

box7

Now your folds should form a grid. The square in the center of the folds with the pencil X in the center will be the top of the box.

box8

Now you need to make four cuts. With one corner facing you, cut along the two creases that are from the corners of the box top to the edge nearest you. Cut just to the corner but careful not to cut further. Try to cut straight and right on the crease. Turn the square to the opposite corner and repeat.

box9

Now you are ready to fold your box. Fold the two uncut corners to the middle, then fold again just so that the fold forms a right angle to the top. Fold in the two “flaps” on both sides.

box10

Now fold up the two cut sides at the crease that forms the edge of the top. Then fold it over the two flaps to secure them. All four corners should meet at the center of the inside of the box. If the card stock is heavy, the corners may hold secure on their own, but you can add a small piece of tape where the four corners meet to secure.

box12

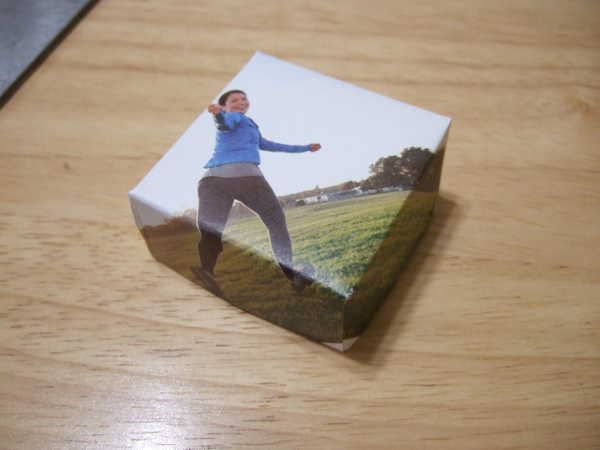
Repeat these steps to form the bottom of the box, cutting the square 3/8″ to 1/2″ smaller than the top.

Word Tree

I used brown construction paper to make a very crude tree trunk and branches. I used green, orange and yellow paper to cut out leaf shapes. To earn a leaf to put on his Word Tree, my son had to tell me a word he knew and spell it for me. Then either he or I wrote it on a leaf. I put two rolls of tape (you can use double sided tape) on the back of the leaf. I let my son add the leaf to his tree wherever he wanted to put it.

wordtree600

Integer Ladder

integerladder
The integer ladder helps children understand negative integers. The ladder is numbered top to bottom from 12 to -5. Here is a PDF file of the ladder that you can use to assemble your own. Have the child use their hand, action figure or small toy animal to “stand” on the rung of the first number of an addition or subtraction equation. For addition, they should climb as many rungs as the second number of the equation to get the answer, or for subtraction they should descend the number of rungs.

Twister Math

Active games give children a physical outlet as well as utilize multiple senses to help commit the subject material to memory.

For twister math, write or print the numbers 1 through 9 very largely on single sheets of paper. Tape the sheets to the floor in a 3×3 grid. The child may use feet and/or hands to indicate numbers that add or multiply to a number given by the teacher.

twistermath

What has worked for us…

I am posting ideas I have had that have worked for us. Every teacher and every student is different, so not all activities will have equal success in all arrangements. I have found it useful to get lots of ideas from lots of homeschool sources, so hope that by adding my ideas to the public realm, I may spark ideas in someone else.

Children’s abilities in different topics are not necessary tied to age, so I am not going to make age recommendations. You will know if an idea is appropriate for your child’s abilities.